
Moving to GMail on your iPhone
After moving from a hosted Exchange service to GMail, you need to set up your email client on the iPhone so that it will receive the push notices.
To do this, you need to add a new Exchange service on the device. There’s a nice step by step of this at http://support.google.com/a/users/bin/answer.py?hl=en&answer=138740
Alternatively, you can use the standard GMail settings, on the iPhone, but my favorite approach is to actually use the GMail app from Google in the App Store. The reason I like that app over the standard iOS mail app is that it is much more of a true mobile client that takes advantage of the platform.
First get the App from https://itunes.apple.com/us/app/gmail-email-from-google/id422689480?mt=8

You can do this either from your iPhone/iPad directly, or using the iTunes store on your Mac/PC.
Once you have the app installed, you need to set up your GMail accounts. Either tap “open” from the App Store page about GMail, or find the GMail icon and launch it.
On launch the app will prompt you to log into your account. For a Google Apps account, this will be the email your administrator assigned you like rob@mydomain.com, and the password that you’ve set up previously by going to http://gmail.com.
Launching the App the first time takes you to the login page, where you can type in your email address and password. Note that this is the same whether you are logging in to a GMail account or a Google Apps account, to Google they are just different users as far as mail goes.
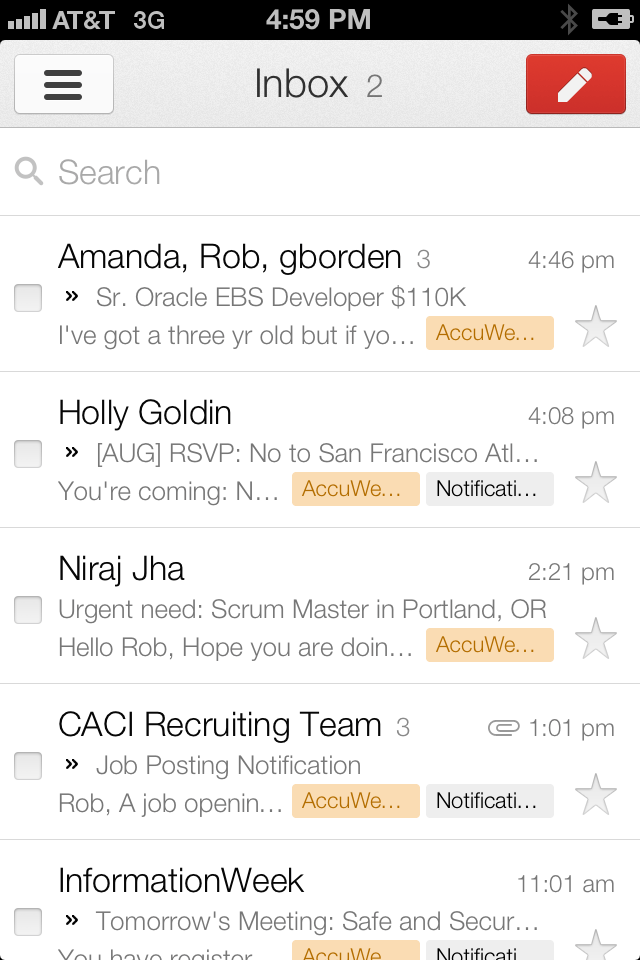 Once you log in, you will be shown the inbox for that account, and be able to read your email pretty easily. To navigate the folders (like sent, draft, etc), you tap on the little icon in the upper left corner that looks like a box with stacked bars.
This will cause the folders and settings pane to slide out from the left and reveal your email structure so that you can choose. Clicking on a particular folder will display that list in the same fashion as you saw with the inbox.

Additionally from this screen, you can add other email accounts by tapping on the profile area at the top of the pane, which slides the list of accounts down and changes the direction of the panel indicator at the top of the pane.
If you’ve already done this, you will see the list of accounts, and each one will be badged with the number of unread messages. Adding a new account is as simple as tapping the large plus icon and logging in. Tapping on a profile picture will switch you to that account once you are logged in.
 The little gear icon in the upper right of this corner brings up settings for you email where you can set a few things (such as vacation responder, signature, etc).

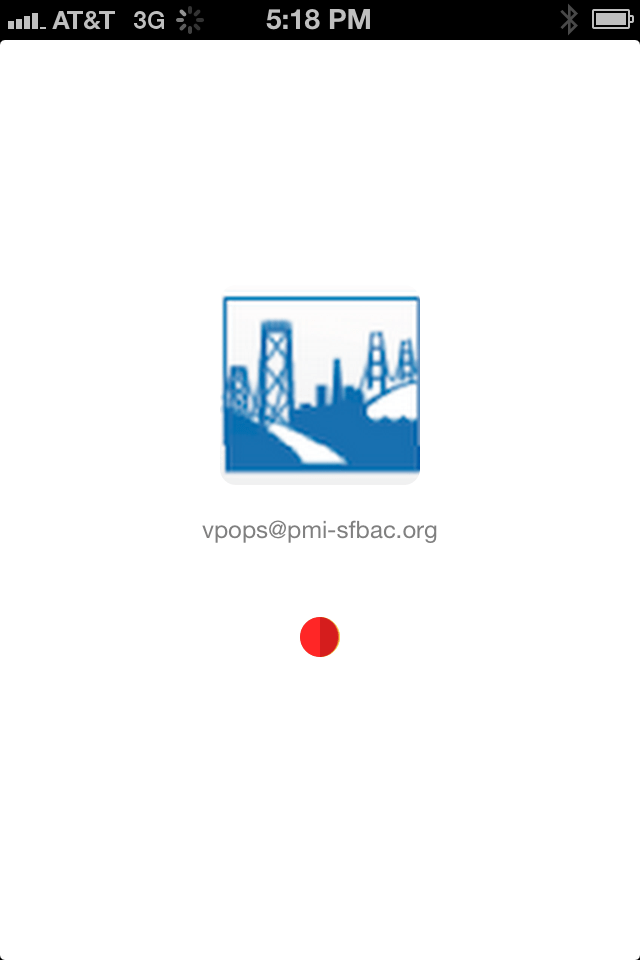
Once you log into the new account, you will again see the loading page, this time with the image from the new account’s name and profile image
The next time that you go to the account selection page, you’ll see a list of accounts with the icon for each badged with the number of unread messages showing so that you can easily see what needs your attention at the moment.
Google apps on the iPhone are a mixed bag, with some being native, and others not, so it’s also a good idea to set up the Apple “Mail, Contacts, Calendars” for synchronization of those things (which can use the Exchange push in the same way as an actual Exchange server).
 The best way to do this is to follow the instructions at http://support.google.com/a/users/bin/answer.py?hl=en&answer=138740
First go to your settings (normally you can find this by clicking the home button on and looking for the gear icon that says “Settings”.

If you’ve previously added accounts, the “Add Account …” will appear below the existing account settings list (in my case I actually have to scroll in order to get to this button.
Tap on the add account button and you’ll be presented with the choice of types of account that you want to use. You can use GMail here, but I prefer to use Exchange simply because it pushes the information to the phone asynchronously

Once you tap on the Exchange button, you’ll get a new page that prompts you for the authentication information. This uses Microsoft’s autodiscover method to figure out how the account should be configured.

Type in the user name and password for your account here, and give it a description. Typically I use the name of the company that has the domain that I’m adding (for example PMI-SFBAC for my pmi-sfbac.org address).
Then click the “Next” button which should bring up the Domain screen. The only thing you need to make sure of is that the server ends up being m.google.com, and that you still have the right username and password. To continue, tap “Next”.

The final step is to choose what you want to be pushed to your phone. Generally the important ones are the contacts and calendars, since those are business related.

It really doesn’t hurt to have Mail turned on as well, since that keeps your inbox in the iOS Mail app up to date, but if you’re worried about your data plan, just set up the contacts and calendars, since that is the part that the GMail app won’t really be as helpful with.